Danish Rugbrød, German Pumpernickel, Sonnenblumenbrot, they all have one thing in common: they’re dense, made with lots of rye and stuffed with cooked grains and in some cases additional seeds.
I love breads like these, they’re chewy, healthy, filling, loaded with fiber and go with everything you can pile on top: cream cheese and smoked fish, cream cheese and veggies, cream cheese and jam… Yes, I actually prefer cream cheese on those dense breads. Butter is for the fluffier ones.
You can cut the slices up into small squares and use them as a base for hors d’oeuvres, make them look fancy with a bit of cream cheese out of a pastry bag and a sliver of thinly sliced smoked salmon and some fresh herbs on top. Can’t beat that!
For this recipe, it’s helpful if you mill your own flour, otherwise you need a very well sorted supermarket to get the cracked grains and the medium rye flour.
If you want to use a mixer, make sure it can handle heavy bread doughs. I managed to kill a Bosch Mum 5 with a dough similar to this, so if you don’t have a heavy duty machine like an Ankarsrum or a Häussler, you might be better off using a sturdy wooden spoon or a danish dough whisk. You don’t have to knead, just stir until everything’s well mixed. This dough doesn’t develop a gluten structure.
Rye bread needs a lot of time, to prep, to rise, to bake, and to cure. So here’s a suggested schedule. That way your day to day activities don’t need to be interrupted.
- day 1 – evening: make the scalder, the cooked grains and the sourdough
- day 2 – morning: make the final dough and fill the bread pan(s)
- day 2 – evening: bake your bread, let it cure overnight
- day 3 – morning to noon: slice the bread and have a first taste
To make the scalder:
- 120g medium rye flour (Roggen 1150 for the germans here, you can also sift whole rye with an 80 mesh sifter)
- 250g boiling water
- 80g sunflower seeds
- 50g linseed
- 14g salt
Roast the seeds in a dry pan over medium heat until the linseeds start to pop.
Mix the flour with the salt, mix in the hot seeds, and then add the boiling water. Mix immediately with a fork or a spoon and cover tightly with clingfilm. Let the mix cool completely before further use. You can keep it in the fridge or on the counter overnight. Due to the salt it won’t spoil.

To make the sourdough:
- 30g of whatever sourdough you have on hand, as long as it’s mature. I used my lievito madre,
- 150g warm water
- 100g medium rye flour
- 30g cracked rye
Mix everything in a big jar, add a lid and leave it at room temperature over night. It should be well risen and bubbly the next morning.
Our bread also has whole grains embedded in the dough, those need to be cooked beforehand, so you don’t ruin your teeth. Just soaking them won’t cut it.
- 50g rye berries
- 50g wheat berries
- water
Add enough water to the pot so the grains are generously covered. Cover with a lid, bring to a boil and cook until soft, about an hour, and then let them steep in the covered pot for another 1-2 hours. If you have a pressure cooker like an instant pot or so, they’re done in 20 minutes on high.
To make the final dough:
(I forgot the salt in the scalder, that’s why there’s an extra bowl, and my molasses is in an ugly squeeze bottle that’s practical but not for photos)

- all of the scalder
- all of the rye sourdough
- all of the cooked grains (without any leftover water)
- 100g cracked rye
- 100g cracked wheat
- 170g warm water
- 1 Tbsp roasted malt powder (it’s non-diastatic! mine’s barley, you can also use rye)
- 1 Tbsp molasses
Mix the scalder with the warm water and the molasses, then add everything else in and mix it well. You’ll end up with a sticky, tough dough (see video).
The dough doesn’t need a first rise, it goes directly into the bread pan. You have the choice between two methods:
- scrape the dough out of the bowl onto a generously floured countertop and lump it into a kinda bread shape. again, there’s no gluten structure, no elaborate shaping possible, just shove it into a bricklike shape and then drop it into a lined bread pan.
- use two big, wet spoons and scrape the dough directly into the lined pan, then spray the dough with water and flatten it with the backside of the spoon.


The amount of dough is perfect to fill one pan 10x15cm / 8cm high (4×6 inches, 3 1/2 inches high). I divided this batch into two of those pans because I needed to figure some stuff out with the slicing and that was easier while having two smaller loaves.
Cover your pan and let the breads rise until afternoon / early evening (8-10 hours depending on your kitchen’s temperature). There won’t be that much change in size, it may rise to 1.5 times the initial size but that’s it. There also won’t be much oven spring, though there might be some cracks appearing on the surface. We’re making a dense bread.
Pre-heat your oven including baking steel or pizza stone to 220°C /430F. Add steam and turn the oven down to 190°C once the breads are in. Baking time can differ depending on how coarse your cracked grains and how thirsty your flour is. My two very flat breads took a bit over an hour. If the pans were full, I think somewhere between 1.5 – 2 hours. You’re aiming for a core temperature of 96-98°C (204-208F). The thump test won’t work.
Get the bread out of the pan and let it cool overnight. If you’re like me and nibble on that first slice while it’s still warm, don’t you dare! You’ll be seriously disappointed. Rye breads need time to cure, a minimum of 12 hours, better yet 24. Fresh out of the oven, the crust is super hard and the insides very squishy and mushy. The bread needs time to get the moisture levels between crust and crumb equalized. Makes it much easier to cut as well.
So just leave it sitting on the cooling rack, no cover necessary.

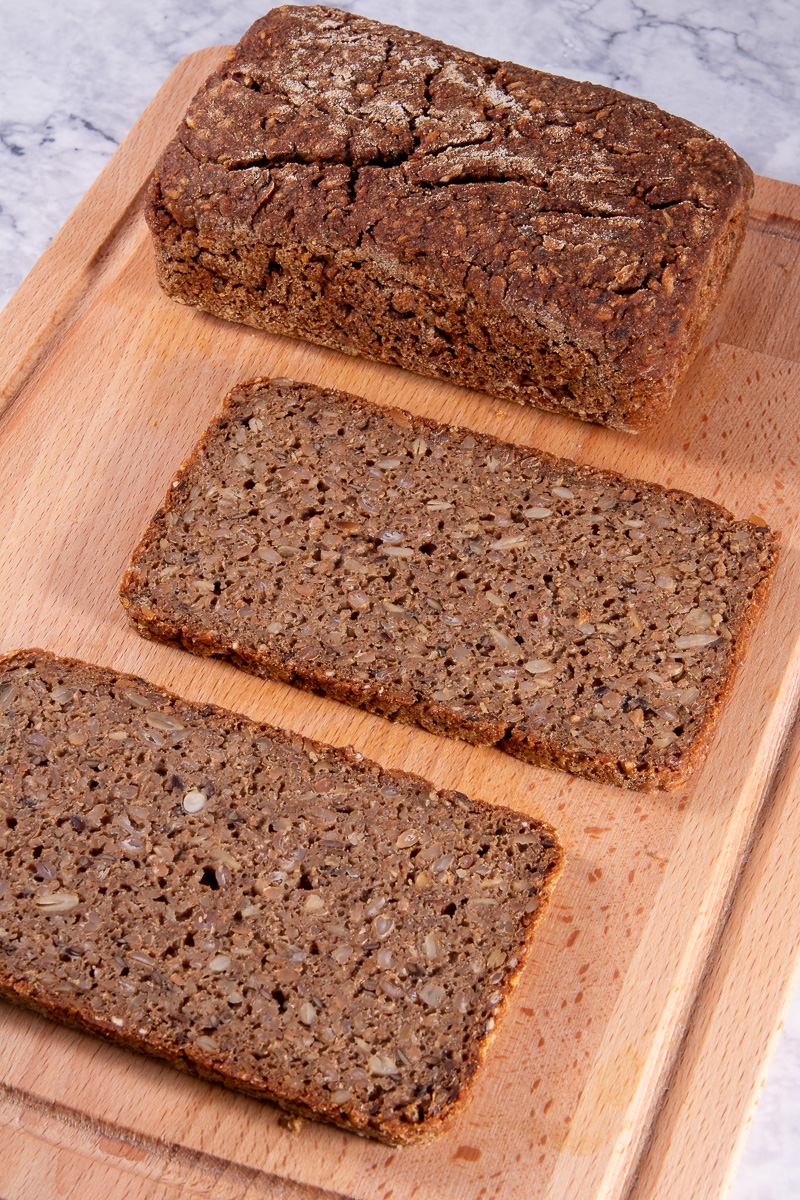
Slicing these breads is a real challenge, there’s a reason why they’re nearly always pre-cut when you buy them. There’s not much to hold all those kernels together.
I tested slicing with a deli slicer, that would be the big slices. I cut off the bread’s bottom and kept going until it was all sliced up. I could go very thin, but the slices had to go around a bit of a bend on the machine, and that made some of them break near the very end.
The small slices are cut with a knife. The serrated blade of my “normal” bread knife made an absolute mess. Not recommended! The wave cut blade of my precious Grandmoulin worked great, only minimal crumbs, but I got the best result with my ancient carbon knife. So use something non-serrated and super sharp to cut these breads into thin(ish) slices. Don’t worry about the crust, if you let your bread cure long enough, the crust will be tough, but not hard. Shouldn’t be a problem for any chef’s knife.


