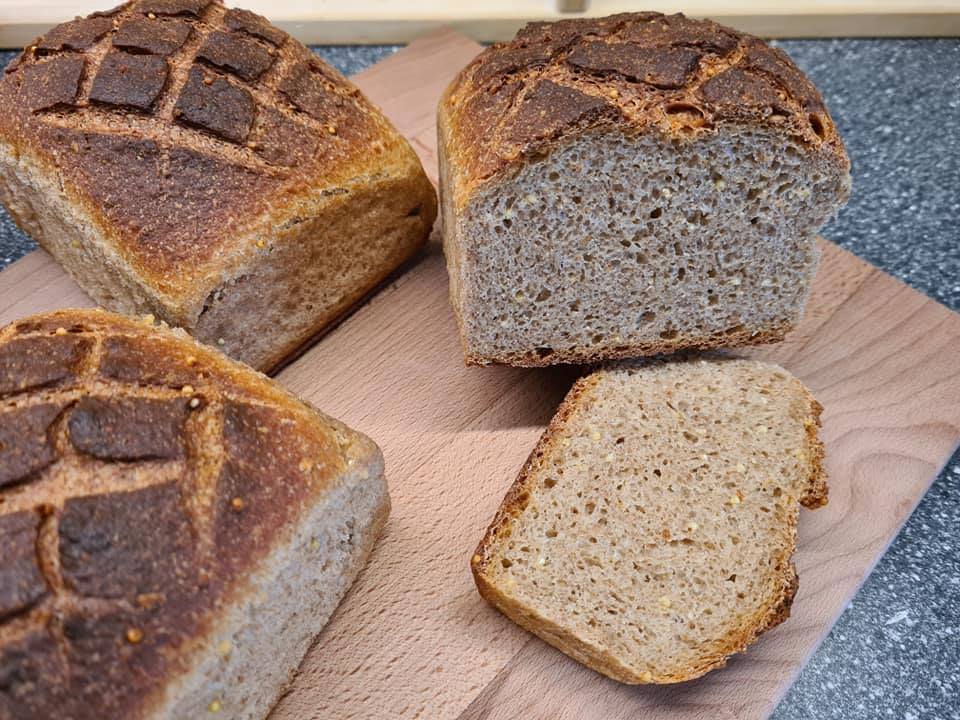
Paderborner Landbrot, Borkenberger Kloben, Doppelback,… You might have seen those breads in german bakeries, and what they have in common is a very prominent top and bottom crust, while the sides are soft and crustless. They make nearly perfectly square slices. Commercially, those breads are baked in a huge metal frame, one piece of dough next to the other, giving each other stability and protecting each others sides from forming a crust. The end product is the aforementioned bread. If you ever baked parker house rolls, the process is similar.
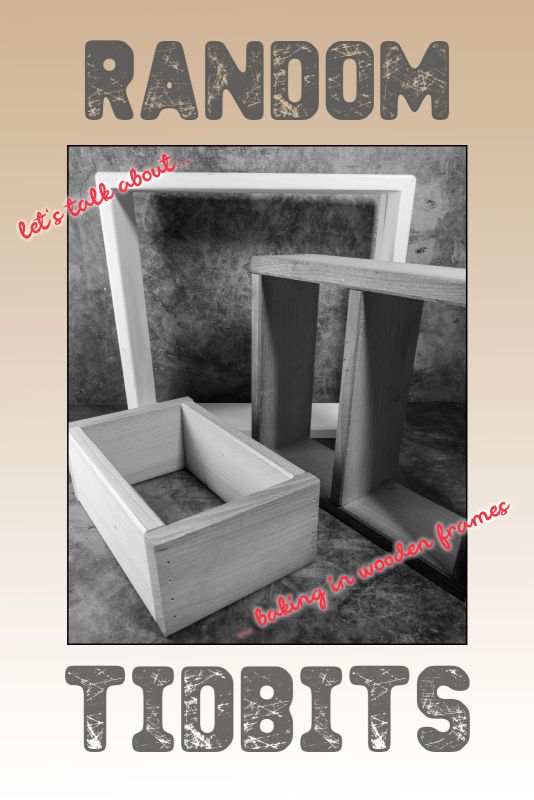
You can achieve the same result at home, using a wooden frame. The wood protects the bread’s sides from the heat and makes small batch baking of those breads possible. You can buy those frames or make them yourself exactly fitting your needs, the wood of choice is maple, beech or acorn.
I have three baking frames, of which I use the middle sized the most. The smallest one makes one loaf of a kilo (or two small ones), the middle one makes two loaves of a kilo each (or four small ones), and the huge one makes 6 small loaves or half a kilo (bit over a pound) each.

The small and medium one have dividers to make the smaller breads, but they aren’t really necessary. I haven’t used those yet.
The wooden frames are made from untreated wood and I found it helpful to season them before I used them for the first time. That way nothing got stuck. Plus, the oil protects the wood from drying out during the bake. You’ll end up with a scorched piece of trash trash otherwise
To season the frames, place them on a piece of parchment paper and brush them generously with a neutral tasting oil. I used coconut, because I use that for nearly anything, but sunflower or canola is good as well. Let the oil dry, apply a 2nd coat and bake the frame at 200°C for about half an hour, then apply the 3rd coat and let the wood cool.
The frame is ready to use now, you have to brush it with oil inside and out before every bake though.
Baking in the frame is easy. You take a cookie sheet, add a piece of parchment to it, and sit your baking frame on top.
Make your dough, keep away from too much flour during shaping either balls or oblong shapes, slightly oil what you made, and place it in the oiled frame.

You can cover the top with a towel if you have a kitchen with a high gravity zone like mine. The oil protects the dough from drying out, but I like to have it covered in case I end up dumping half my spice rack on top.

Pre-heat your oven including baking steel or pizza stone, make sure you have enough space on top, and once your breads are risen and scored, shove the cookie sheet, frame and everything into the oven and place it on the pre-heated stone/steel.
You bake with steam, keep the initial temperature for about 10-15 minutes, then turn the heat down a bit. The bake itself takes a bit longer than with a freeform bread or a metal pan. Add about 15-20 minutes. The top crust is supposed to be dark and crunchy, so using a thermometer to get the core temperature might be a challenge, but it’s the best way to determine if the breads are ready. Depending on the grains you used, it should be between 92 and 96°C.
Once the breads are done, get the cookie sheet out of the oven and place it on a rack. Leave it for a few minutes, then grab the wooden frame and lift it up. Ideally, the breads should slide right out and stay on the cookie sheet. If not, you can help by sliding a sharp knife between the frame and the bread.

If you made several small breads without a divider, pull them apart now, then get rid of the cookie sheet and the parchment, and let the breads cool on a rack.
To take care of the wood frame, brush crumbs off, if anything is really stuck, you can use a bench knife or a butter knife to get the pice of dough off, sand the place carefully and add some more oil.
These are some breads I like to bake in the wooden frame, but you can basically use it for every bread you make.
bottom: scottish struan (very versatile harvest bread)
both recipes will appear here eventually


