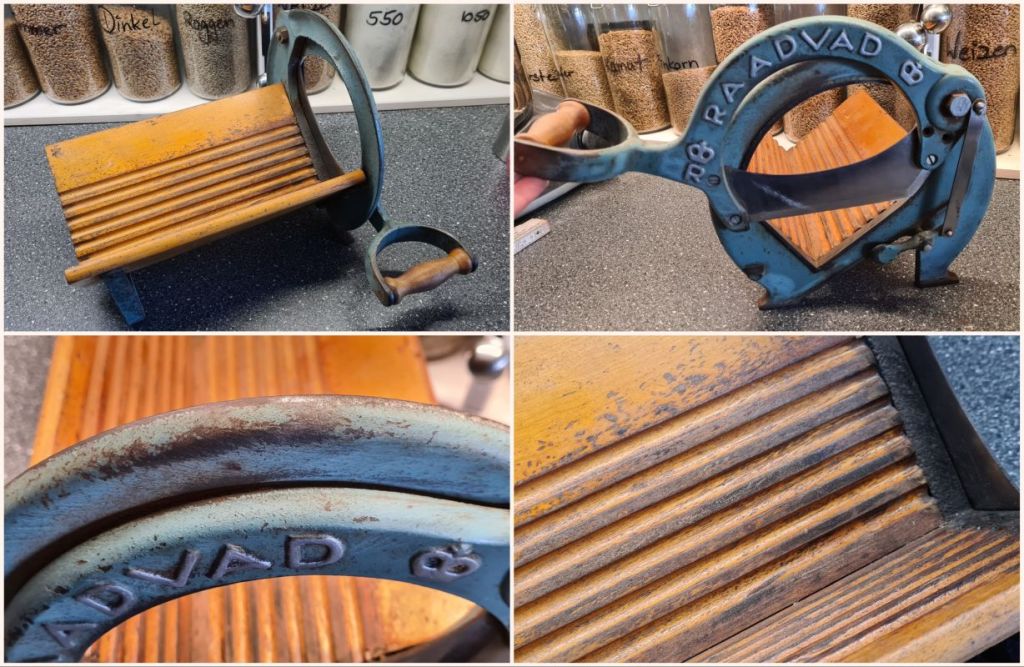
I found this vintage bread slicer on ebay a while ago. For something made in the the first half of the last century, it was in overall good shape and working condition, but also in desperate need of some tlc. The original color looks a bit off in some of the photos, it was a washed out teal.
To properly clean it, I took the whole thing apart and of course, there’s always that one screw that’s rusted into the frame so hard, no amount of force or rust remover would make it budge. I eventually sawed it off. The screw’s head stayed stuck and I had to use a drill to get it out.
And while the whole bread slicer appeared kinda clean(ish) but definitely used, there was a lot of hidden rust and gunk.
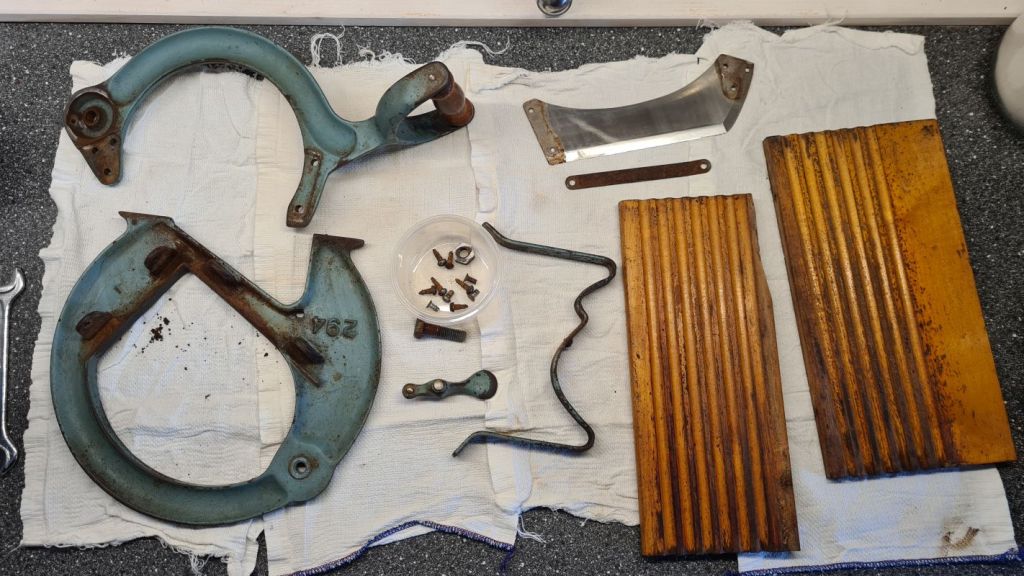
after taking it apart, I had my work cut out:
– blade: sharp but the edge is an absolute mess, full of crooks and nicks. cleaning and complete re-sharpening
– frame: needs cleaning, sanding, new paint
– handle: good, just a bit greasy. some light sanding and oiling
– boards: yucky, very brittle and rotting around the screws. full replacement.
– screws: rust remover bath and partial replacement, some are missing
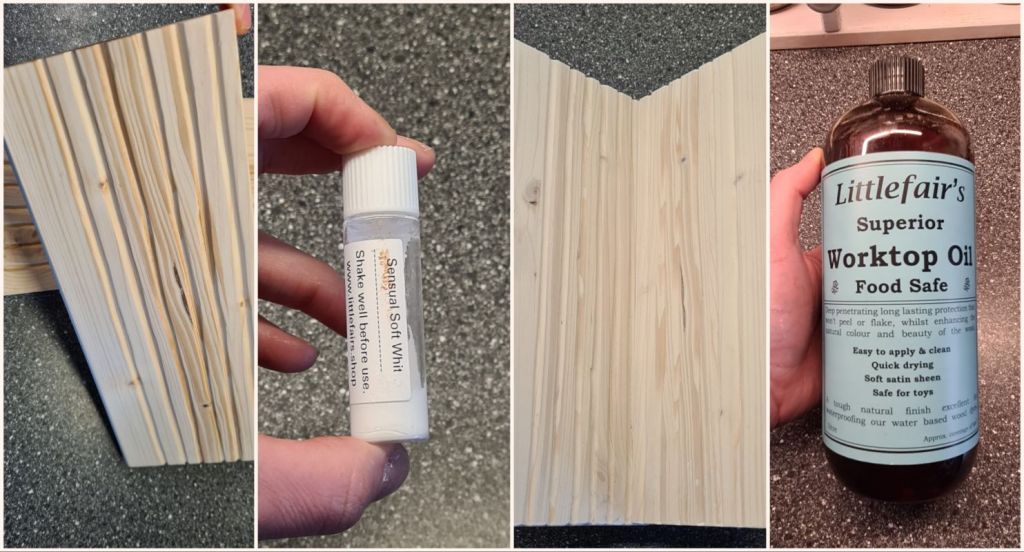
The hardware store didn’t have the kind of wood I wanted, so I used some scraps I had at home. I cut the boards to size and hand-carved the (very crooked) grooves. The white tester of stain worked great and was upgraded to a full bottle. The boards got two layers of stain and three layers of worktop oil for a finish. The result is super smooth.
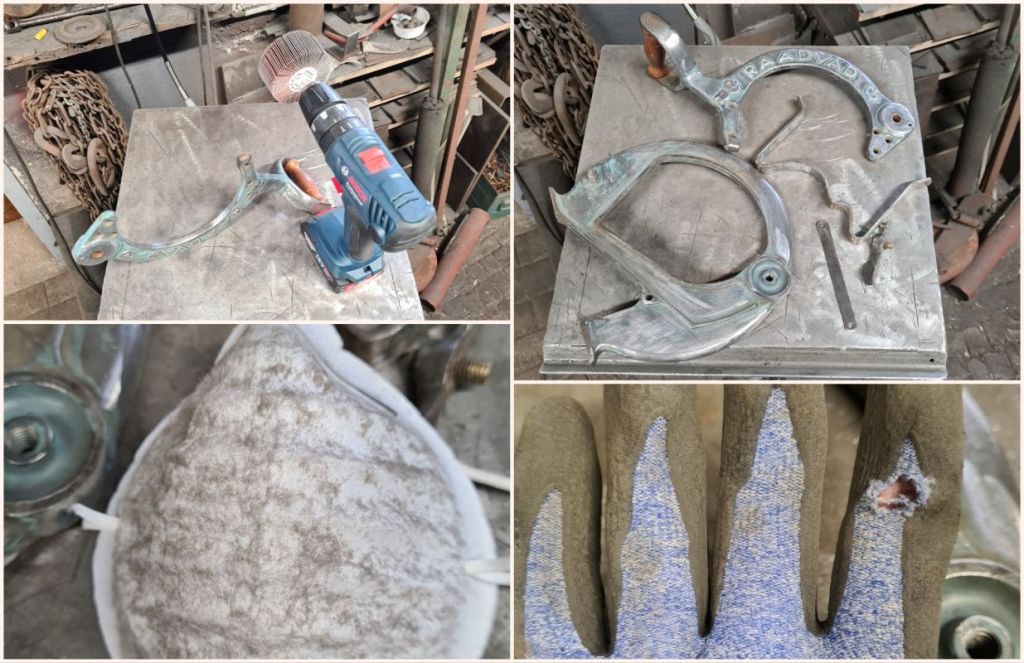
The fan grinders on the drill plus the dremel made for easy but awfully dusty work. I’m a total klutz, so it was just a question of when, not if I managed to attack myself with a power tool. It was just the glove though, the finger didn’t get hurt.
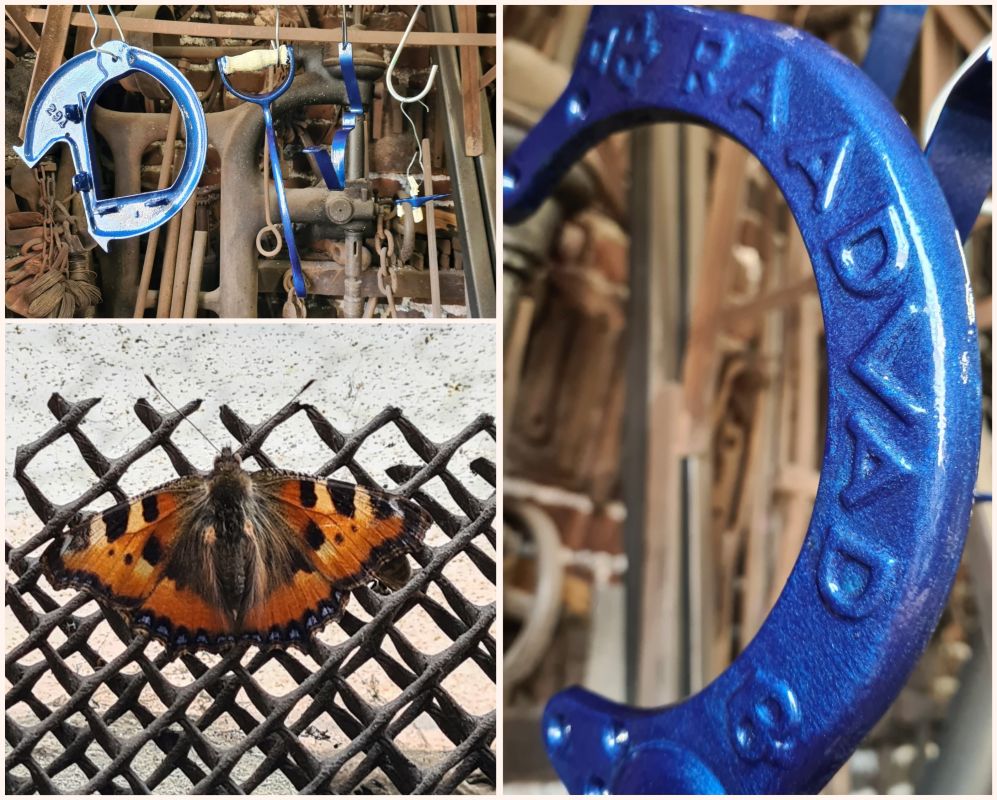
The frame got two layers of an anti-corrosion paint with a hammered finish. It covers all the tiny nicks and bumps in the old iron. I’m stupidly excited about the color!
I was too lazy to tape the letters all up. I wasn’t sure if I wanted them silver again, and I still haven’t decided on it. It’s an easy sanding job if want them to go back to silver.
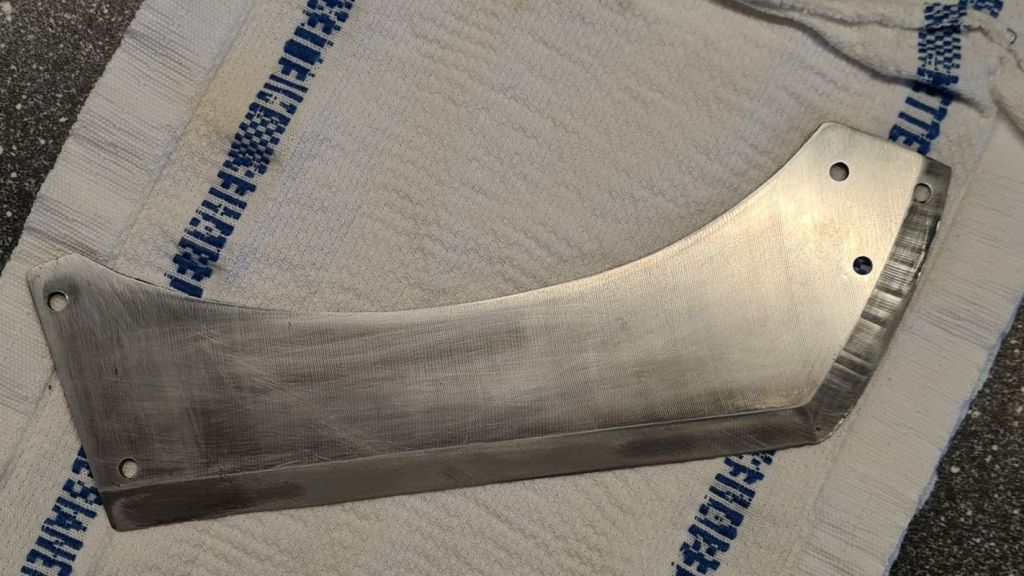
The blade needed a lot of work: some careful filing to straighten the bent edge, then a full hour of playing with different whetstones from 400 to 4000 grit. I ended up with a razor sharp edge and two cut fingers.
I still need to replace two missing screws, but I like the result so far! Looking at this picture, I think I’ll sand the handle down and give it a white stain as well.

the project lasted a week, so the playlist is a bit of a style mix
- Amorphis – Halo (full album on repeat)
- Metallica – Master of Puppets (full album)
- Rammstein – Sehnsucht (full album)
- Billy Idol – Greatest Hits (some favorites)
- Disturbed – Evolution (some favorites)

4 responses to “Vintage Bread Slicer – Overhaul”
This is wonderful! Watching the complete overhaul of your vintage bread slicer is rather magical and amazing!
LikeLiked by 1 person
thank you! I was thinking about turning it into a purely decorative piece for a second, but old cast iron needs to work to really shine. So I’ve been using it for all kinds of slicing jobs.
LikeLike
Michele shared your blog link on a MeWe sourdough group we’re both in when I was lamented how I would love a slicer. This is completely above my pay grade, but what a wonderful project and satisfying result!
Two questions: 1.) Are the screws difficult to find, and B.) How are your fingers? (I’d of likely had to have at least one reattached by the time I was done. 😉)
LikeLiked by 1 person
Hi Nancy,
that slicer was only a bit over 30€ on ebay, I got really lucky there. Fingers are still in one piece and the only scars I have are actually from my bread knife, not the slicer. I really shouldn’t have tried to catch it when it slid off the counter 🙈
The screws were no problem, it only took a visit to the hardware store to get something fitting.
LikeLike